How to update my Square website
Logging into your Square account.
To log into Weebly via Squareup (best to do this from a PC Desktop):
1 Visit https://squareup.com/login?app=weebly&return_to=https://www.weebly.com/app/front-door/login/square
2. Log into your Weebly/Squareup account using the log in details emailed to you on handover.
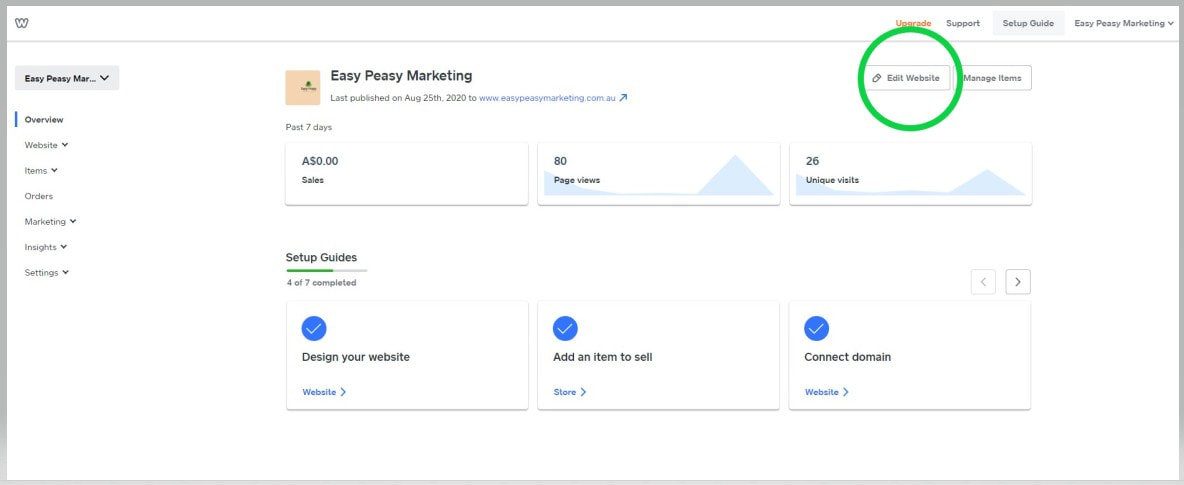
3. Once logged in, you will see a page shown as below. Click on "Edit Website: button.
1 Visit https://squareup.com/login?app=weebly&return_to=https://www.weebly.com/app/front-door/login/square
2. Log into your Weebly/Squareup account using the log in details emailed to you on handover.
3. Once logged in, you will see a page shown as below. Click on "Edit Website: button.
Editing text boxes.
Weebly is a ‘What You See Is What You Get’ (WYSIWYG) website builder. This means you can click and edit, as well as drag and drop media, without needing to know any code. So to update the text, simply click the box and type.
Editing the background.
You can customize your theme even more by changing the background. Simply click the background image and select ‘Edit Background’. From there you can change the image, scrolling effect, and page alignments.
Adding elements.
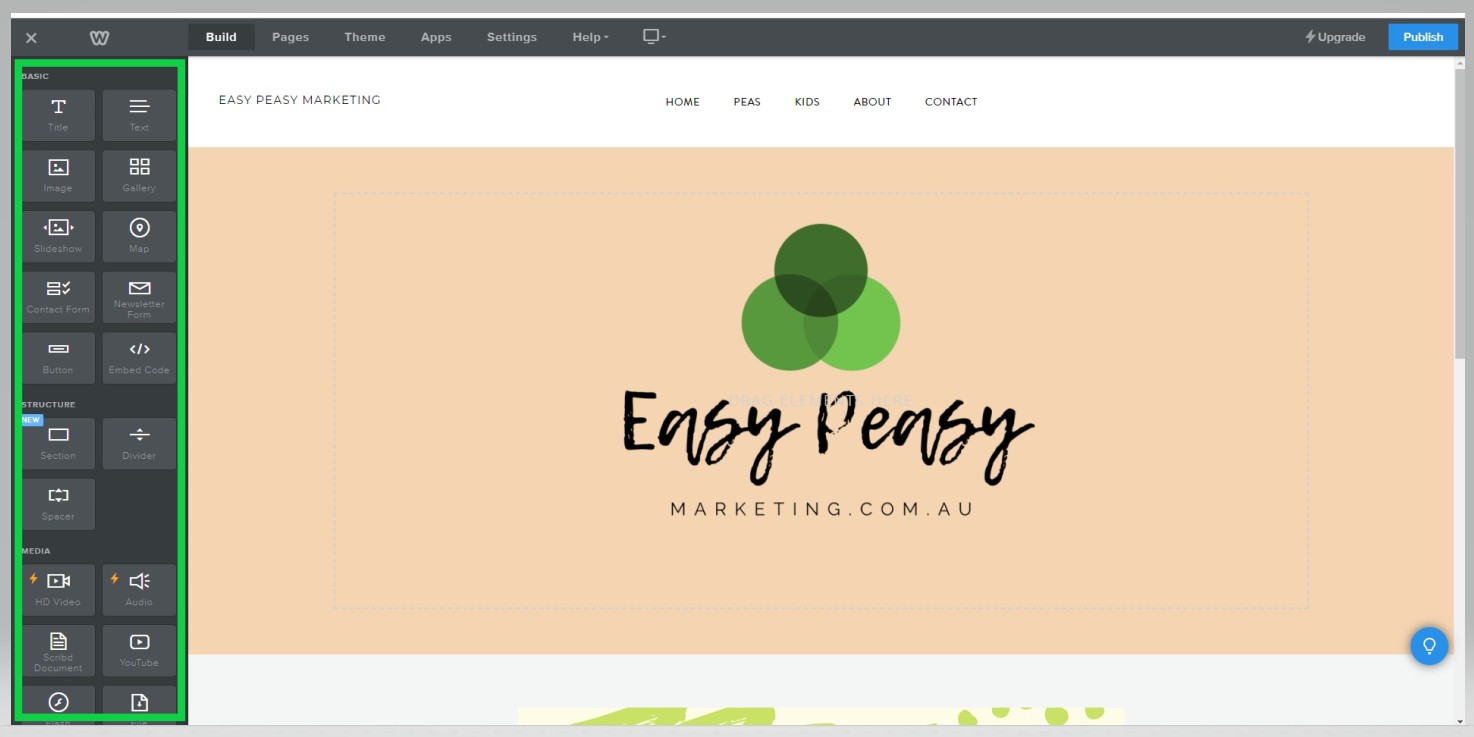
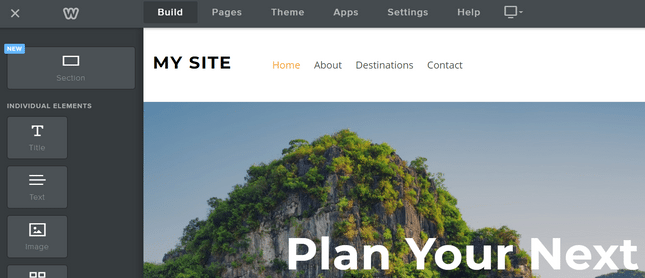
This is where you add the fun stuff. Using the ‘Element Menu’, on the left hand side, simply drag and drop your chosen media icon anywhere on the page. You can throw text, videos, buttons, and more anywhere you like. Take a look at the Element Bar below for just some of the elements you can choose from:
Any element with the lightning bolt symbol next to it can’t be used on the free plan – you’ll need to upgrade to use these features. However, everything else is free for you to play with!
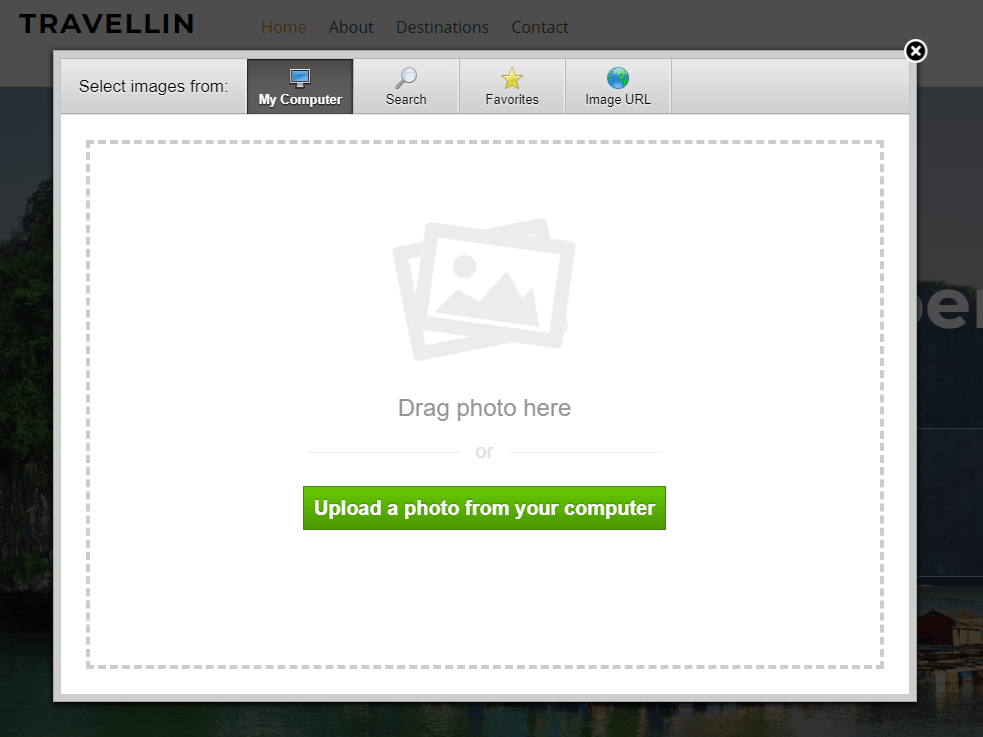
Let’s say you want to add an image. Drag the icon where you want, then click ‘Upload Image’. A popup will then give you some options: you can upload from your computer, or press ‘Search’ and find a free Weebly image.
Let’s say you want to add an image. Drag the icon where you want, then click ‘Upload Image’. A popup will then give you some options: you can upload from your computer, or press ‘Search’ and find a free Weebly image.
To edit other pages on your Weebly website, simply click ‘Pages’ on the top Navigation Menu and choose a different page. Adding elements is the same process for each page – just drag, drop, and click your way to a beautiful website.
From the Navigation Menu, you can make the most of Weebly’s flexibility. Change your theme, edit your site settings, move to a different page – it’s all there.
Adding new pages
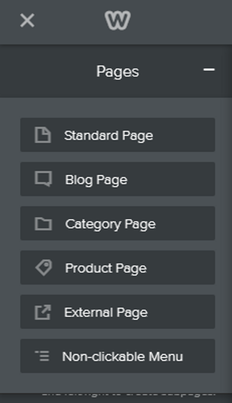
It’s easy to add new pages to your website. Simply go to the Pages tab in your menu and click the plus icon in the left-hand sidebar. A drop-down menu will appear with different types of pages.
Select the type of page you want to create – a blog page, for example – and give it a name. As you do this, Weebly automatically loads the page for you, with pre-filled images and content for you to make your own.
Remember to click ‘Done’ to save your new page’s settings. Once you’ve done this, return to the ‘Build’ menu tab to edit the page just like you would normally!
Remember to click ‘Done’ to save your new page’s settings. Once you’ve done this, return to the ‘Build’ menu tab to edit the page just like you would normally!
Changing the Color Scheme
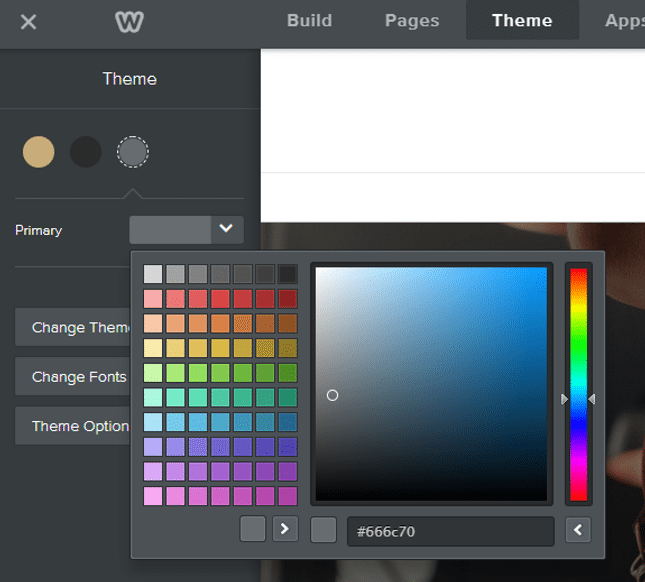
You can change the color theme of your page by heading to the Theme section of your dashboard. For some themes you simply have the options of light or dark, while others give you actual colors to switch between.
This is fairly basic and you won’t see massive changes to your theme, but you can add a custom color to the range of choices if you want to.
This is fairly basic and you won’t see massive changes to your theme, but you can add a custom color to the range of choices if you want to.
Adding new layouts
To really personalize your website, you’ll want to add new sections to the pages you’re editing. Apart from adding new elements, there’s also the option to add new sections.
This element sits at the top of the left-hand sidebar above all the other elements – simply drag it to where you want it on the page and let go.
This element sits at the top of the left-hand sidebar above all the other elements – simply drag it to where you want it on the page and let go.
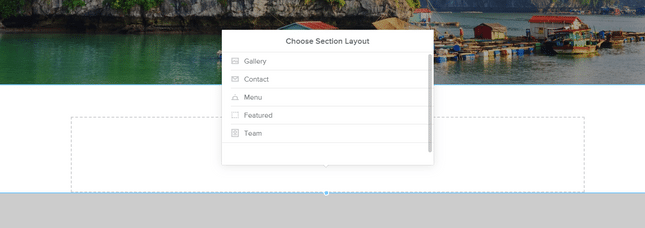
It’ll give you a list of options: Gallery, Contact, Menu, Featured, and Team. Select the one you want to add.
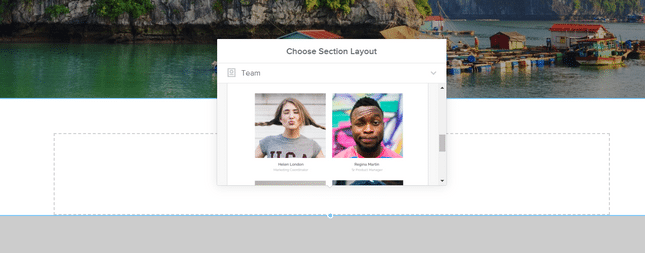
Weebly then gives you a list of different layouts to choose from, so you can pick the one you like the best. Click on the layout you want, and it’ll appear on your page. Click save in the popup box, and get editing!
Deleting Sections
We all make mistakes, we all change our minds, and we all learn differently – we’re only human after all! That’s why it’s important to know how to delete elements on your site, as well as adding them.
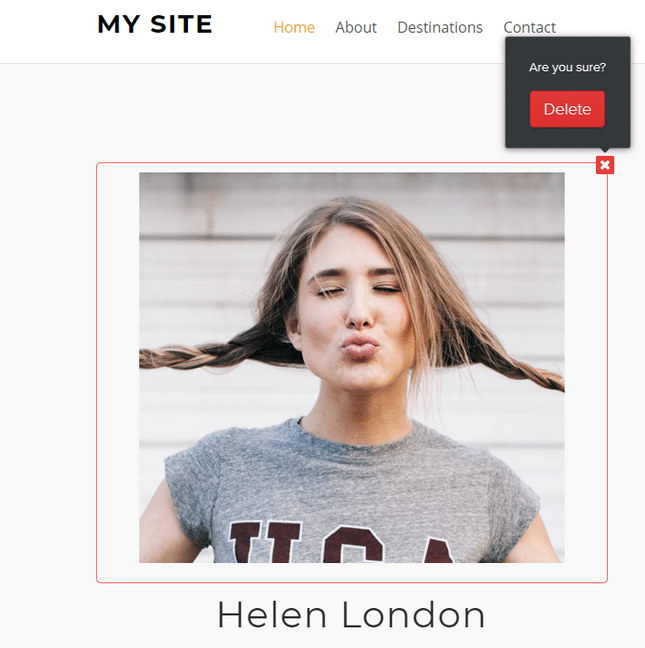
You might want to try out a gallery on your homepage, but then decide it doesn’t work. You’re not stuck with it forever – simply click on the element, and look for the small blue cross that appears in the top right corner of the editing box.
Click on that cross, the box will turn red, and you’ll have the option to delete that element.
This is how to delete small elements such as galleries, text boxes, images, buttons, and more.
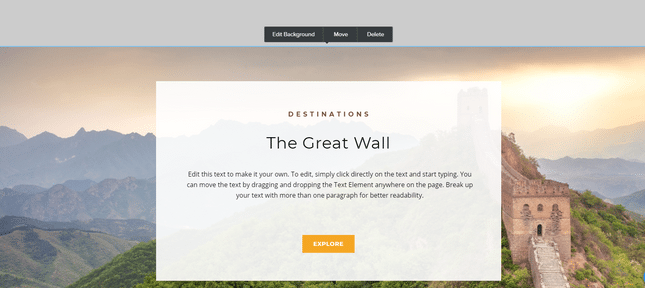
If you want to delete a larger section such as a background, simply click on the area you want to remove. You’ll see a few options appear: Edit, Move, and Delete. Click the Delete button and you’ll see a popup asking you if you’re sure you want to delete. At this point you can either cancel or confirm – if you click ‘Delete’ then that section and everything inside it will be deleted.
If you want to delete a larger section such as a background, simply click on the area you want to remove. You’ll see a few options appear: Edit, Move, and Delete. Click the Delete button and you’ll see a popup asking you if you’re sure you want to delete. At this point you can either cancel or confirm – if you click ‘Delete’ then that section and everything inside it will be deleted.
This ‘are you sure?’ method means you won’t scrap any bits of your website by accident, which is a relief!
Publish your site
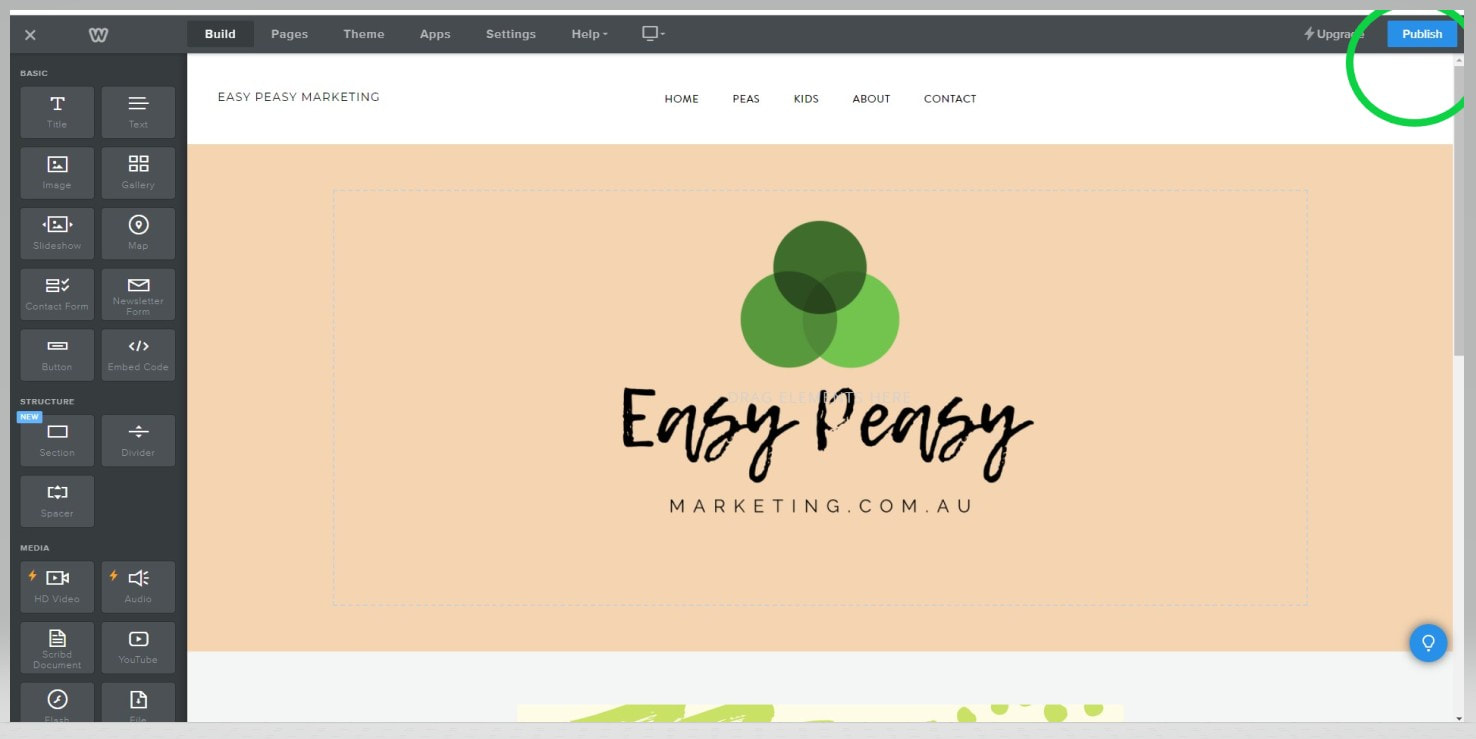
Whenever you have made changes, you then want them to be made "live" on your website. So be sure to always click on the "Publish" button - which can be found in the top right hand corner.
Still a little unsure on something?
Please dont hestitate to contact me, I would be more than happy to help :)
Good Luck!
Janelle
Easy Peasy Marketing
Good Luck!
Janelle
Easy Peasy Marketing

